Have any question?
Call (409) 861-4450
Call (409) 861-4450
Microsoft Word’s massive cache of options and its relative ease of use are two of its defining characteristics. This presents organizations and users alike with a large set of different ways they can set up the word processor. Today, we will take you through Word, providing tips on how to change these settings so that you can get the most out of it.
Of course, you will want to consult with your IT administrator before you go to make any major changes.
There is a good chance that you will enter some text at some point that you know is correct, but Word will tell you it’s not. Maybe your business’ name is spelled funny. Maybe you simply stylize some words and phrases differently. Regardless, instead of being distracted by errors, you can simply teach Word to not track these style choices as errors.
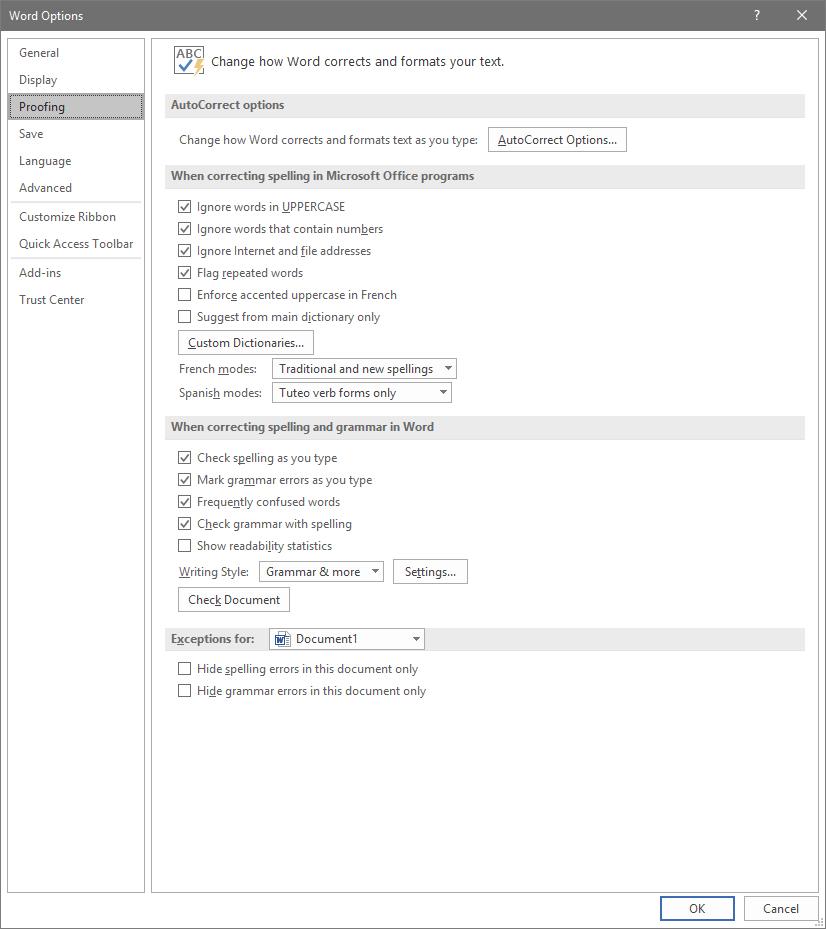
To access these rules, select File, and from there, Options. A new window should pop up with a Proofing option in the list. That page looks like this:

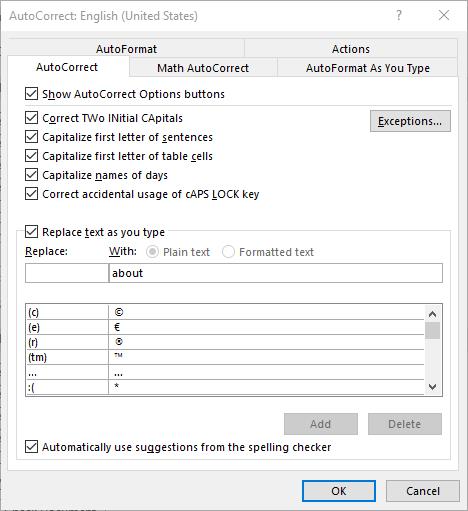
You can change your proofing options in the following menu. This includes your AutoCorrect Options. Simply selecting the button will open another window.

This is the menu that will allow you to set your AutoCorrect rules, including exceptions you want to make to the autocorrect system in Word.
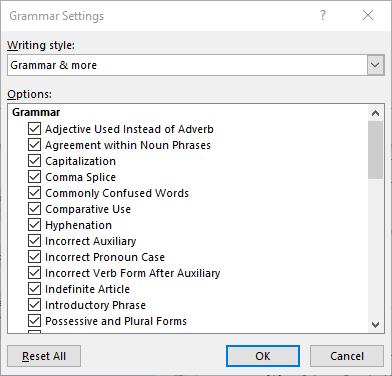
If you return to the Proofing List window, you can see other options that control Word’s corrections. One example is by clicking on the Settings... button under When correcting spelling and grammar in Word. It will bring up this window:

These are the controls for the grammar rules that Word works under. It’s comprehensive, but if you toggle some off, you will be flagged for less mistakes, causing fewer distractions.
By choosing to implement these changes, any user can prevent the hundreds of small annoyances that get in the way of your ability to write in Word. If you would like to see more great tips and tricks about how to use today’s most popular productivity suite, Office 365, return to our blog regularly.
Get the Knowledge You Need to Make IT Decisions
Technology is constantly evolving, and keeping up can feel overwhelming. Whether you want to understand cybersecurity threats, explore automation, or learn how regulations like PCI DSS impact your business, we’ve made it easy to access clear, straightforward insights on key IT topics.
Learn more about what NetWorthy Systems can do for your business.
NetWorthy Systems
701 W. Division Ave Suite 100
Orange, Texas 77630